最近一段时间,把博客从hexo迁移到了hugo,顺便整理下,使用github actions自动部署到github pages。
编写脚本
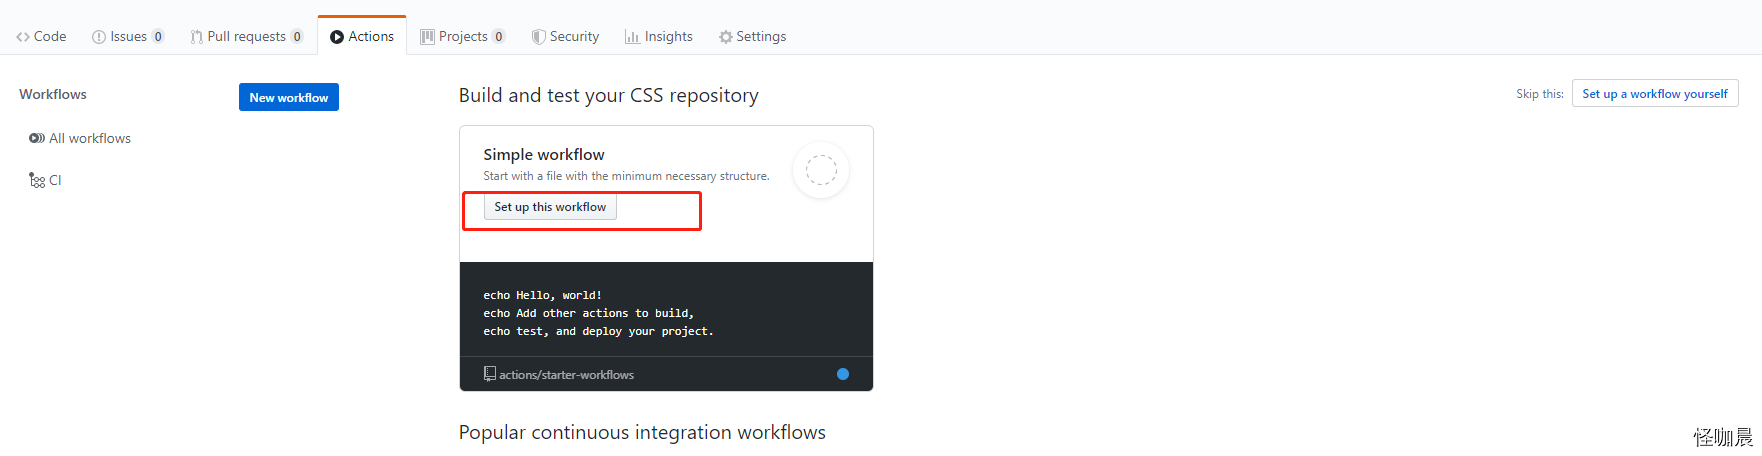
- 首先打开自己项目中的Actions,进入之后,它有很多的自动化部署工具,我们选择Simple workflow
- 选择后,会出现一个yml文件的编辑器,里面的内容是这样的:
 1
 2
 3
 4
 5
 6
 7
 8
 9
10
11
12
13
| name: CI
on: [push]
jobs:
build:
runs-on: ubuntu-latest
steps:
- uses: actions/checkout@v1
- name: Run a one-line script
run: echo Hello, world!
- name: Run a multi-line script
run: |
echo Add other actions to build,
echo test, and deploy your project.
|
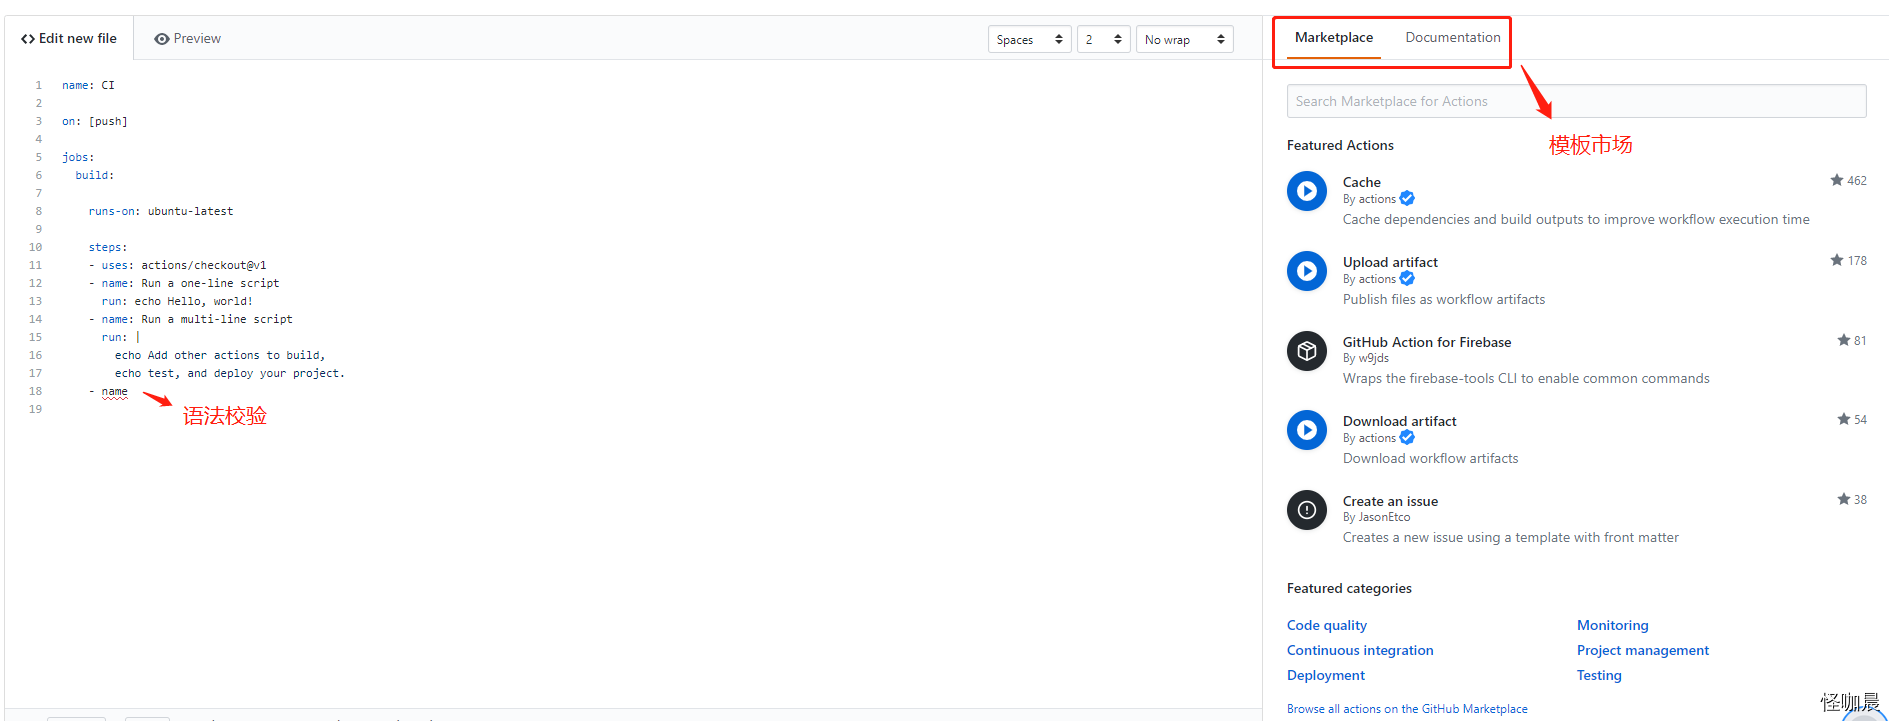
我们结合上图,说下标注的地方,也是github的一个亮点吧,在编辑器中,他们我们的yam文件进行了语法的校验,同时也做些key的校验,比如存在users的时候,就不能出现run,我个人理解,users本身就是一个动作,所以无法再去执行其他命令;然后模板市场,里面有很多开发语言的部署脚本,都是大牛们封装好的,找到符合自身项目的直接使用就行。
调整yml文件内容
因为使用的hugo的博客,所以官方是提供的自动化脚本的,我们再此使用了两个官方提供的workflow。


废话不多说,直接上代码
 1
 2
 3
 4
 5
 6
 7
 8
 9
10
11
12
13
14
15
16
17
18
19
20
21
22
23
24
25
26
27
| name: CI #自动化的名称
on:
push: # push的时候触发
branches: # 那些分支需要触发
- master
jobs:
build:
runs-on: ubuntu-latest # 镜像市场
steps:
- name: checkout # 步骤的名称
uses: actions/checkout@master #软件市场的名称
with: # 参数
submodules: true
- name: Setup Hugo
uses: peaceiris/actions-hugo@v2.2.2
with:
hugo-version: '0.59.1'
extended: true
- name: Build
run: hugo --minify
- name: Deploy
uses: peaceiris/actions-gh-pages@v2.5.1
env:
ACTIONS_DEPLOY_KEY: ${{ secrets.ACTIONS_DEPLOY_KEY }}
EXTERNAL_REPOSITORY: homeant/homeant.github.io
PUBLISH_BRANCH: master
PUBLISH_DIR: ./public
|
准备部署
我们开发的项目及github pages实际是分开的,所以咱们出现了两个仓库,那怎么在开发项目buider完成后,部署到github pages呢,别慌,跟我一步一步来。
- 生成提交代码用的ssh key
1
2
3
4
| ssh-keygen -t rsa -b 4096 -C "$(git config user.email)" -f gh-pages -N ""
# You will get 2 files:
# gh-pages.pub (public key)
# gh-pages (private key)
|
假设
开发项目为 tianhui.xin
部署的项目为 tianhui.github.io
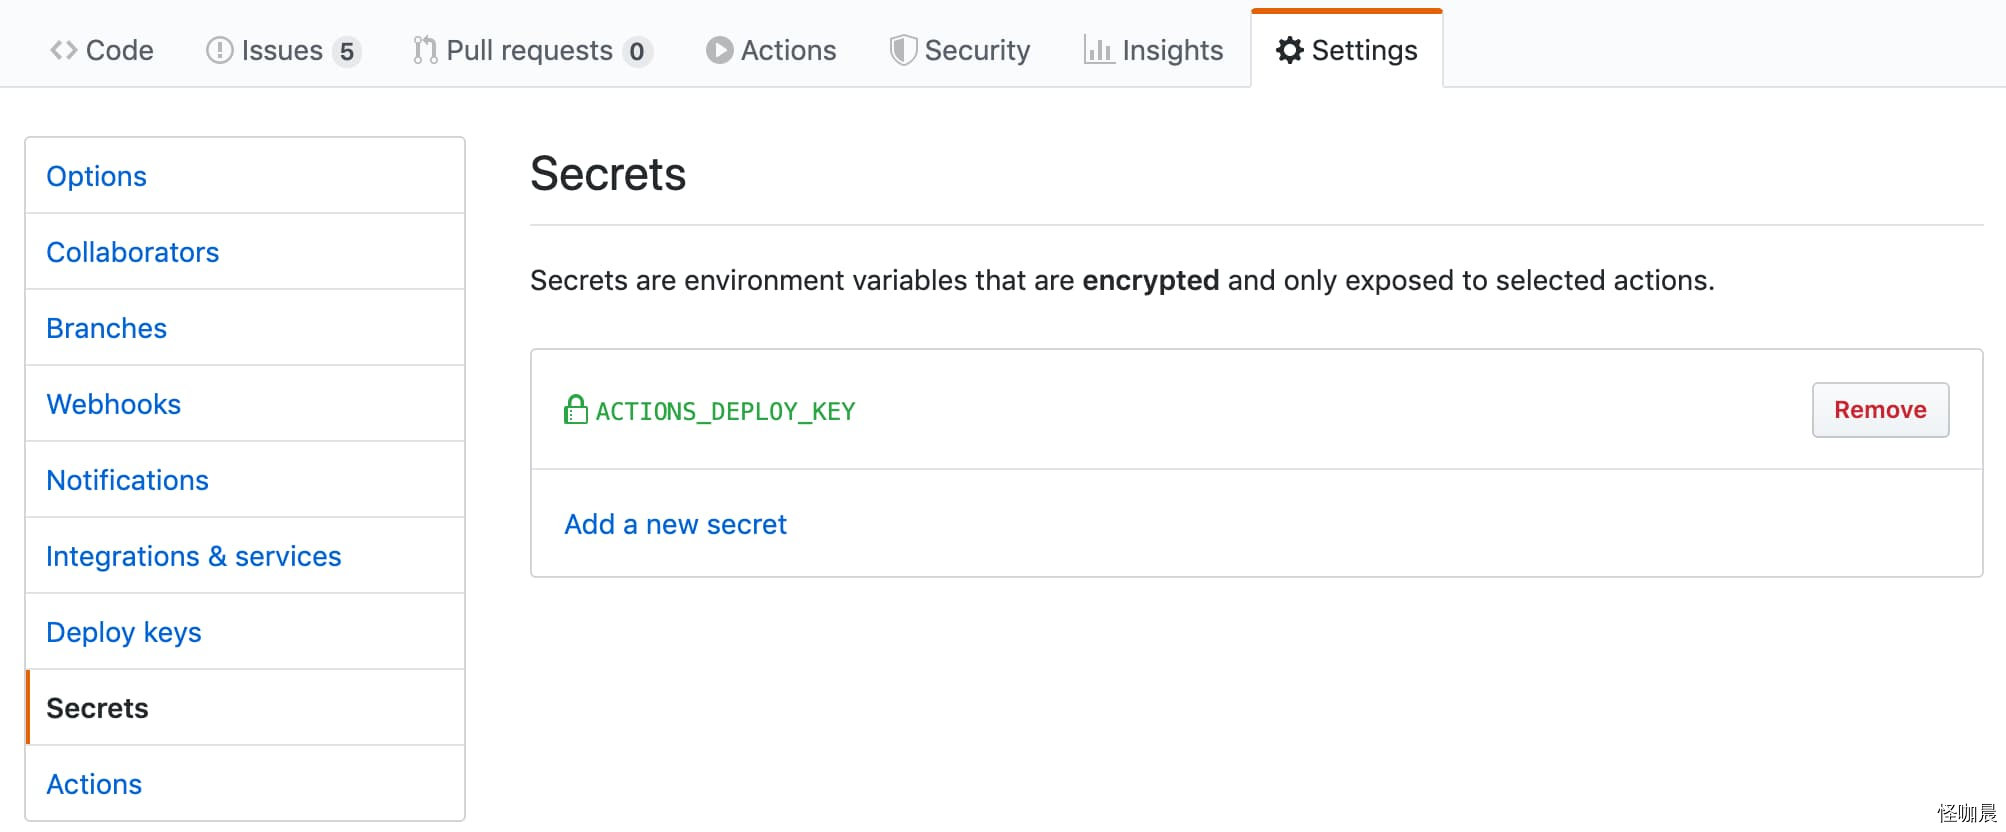
打开tianhui.xin仓库的settings,再点击Secrets,然后添加咱们刚刚生成的私钥,name为ACTIONS_DEPLOY_KEY
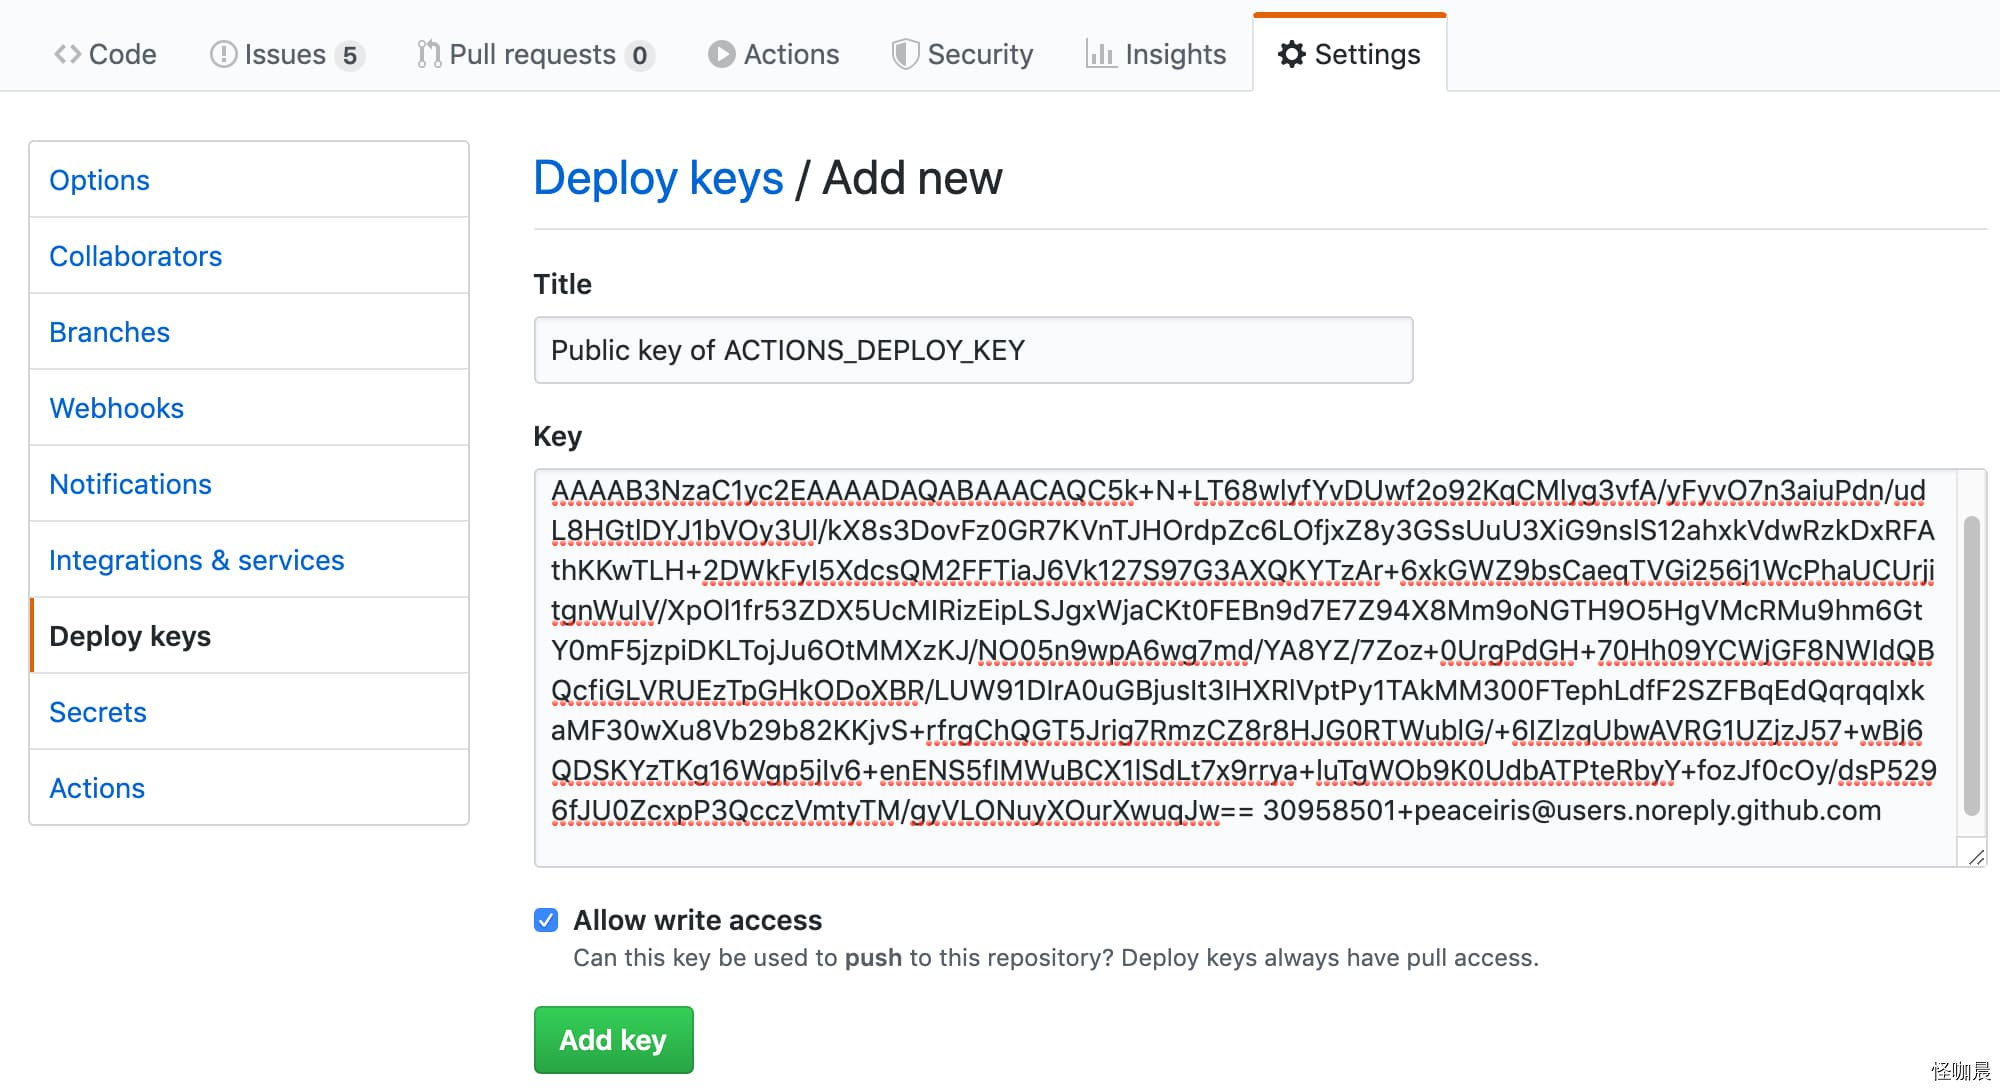
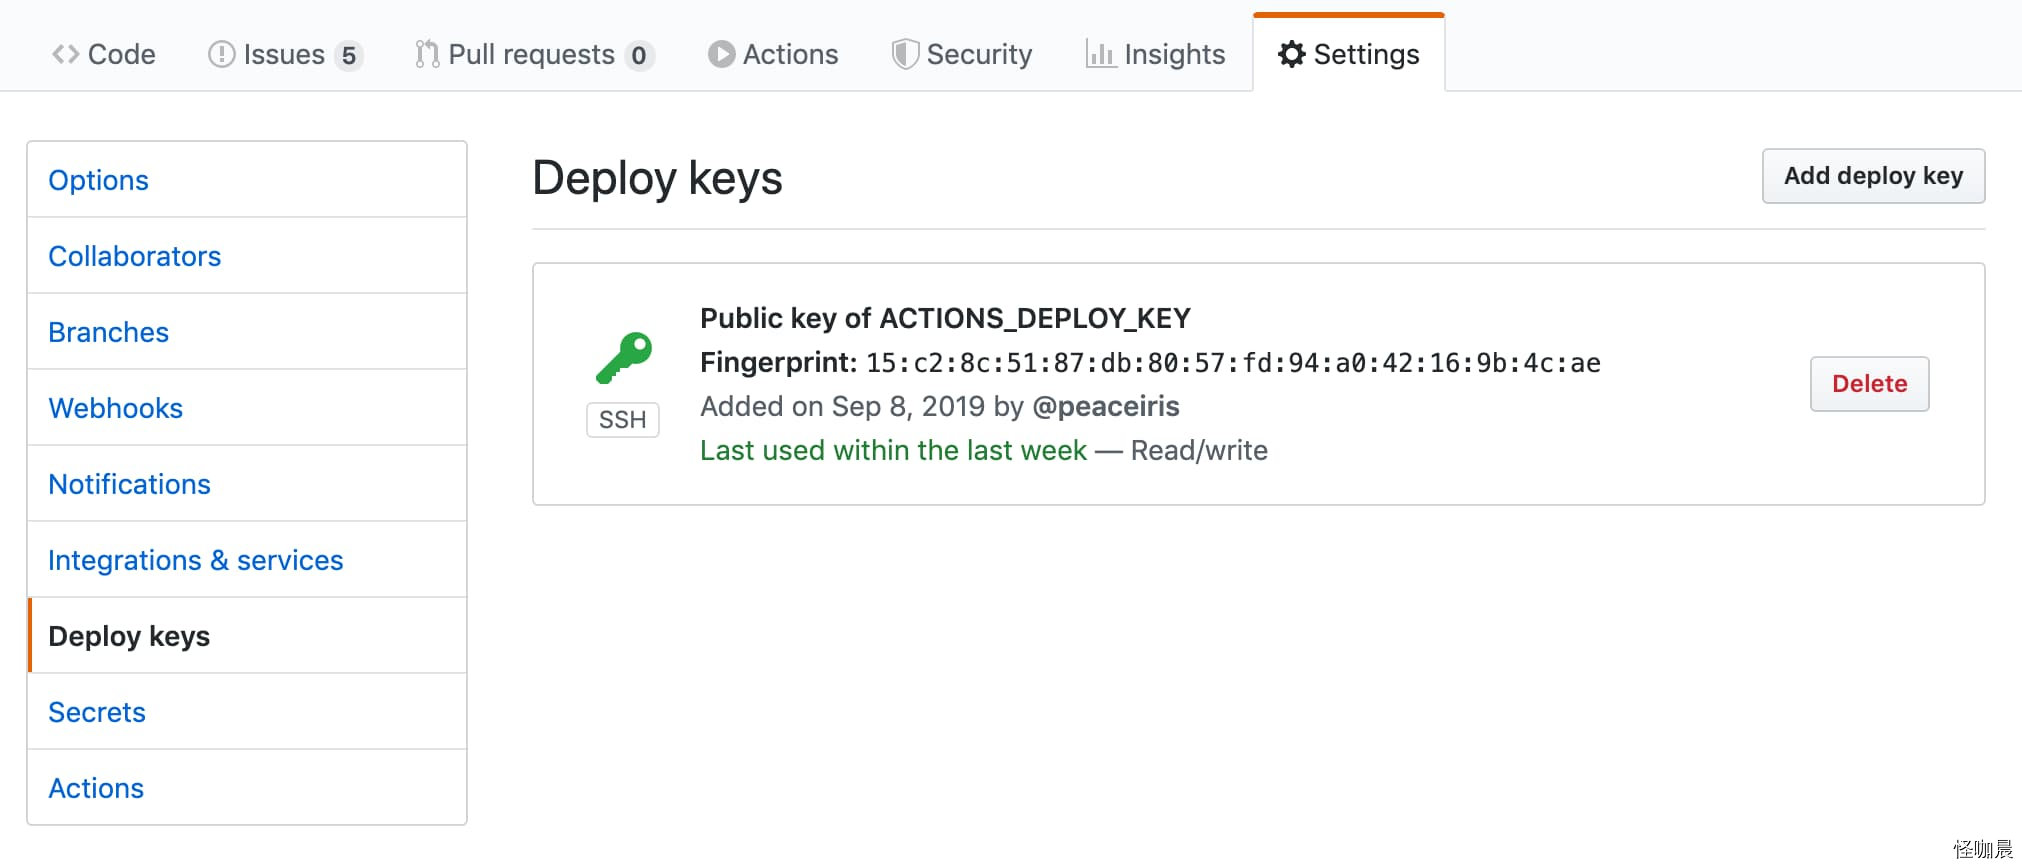
同理,打开tianhui.github.io,点击Deploy keys,添加公钥,Allow write access一定要勾上,否则会无法提交
| Add your public key | Success |
|---|
 |  |
| Add your private key | Success |
|---|
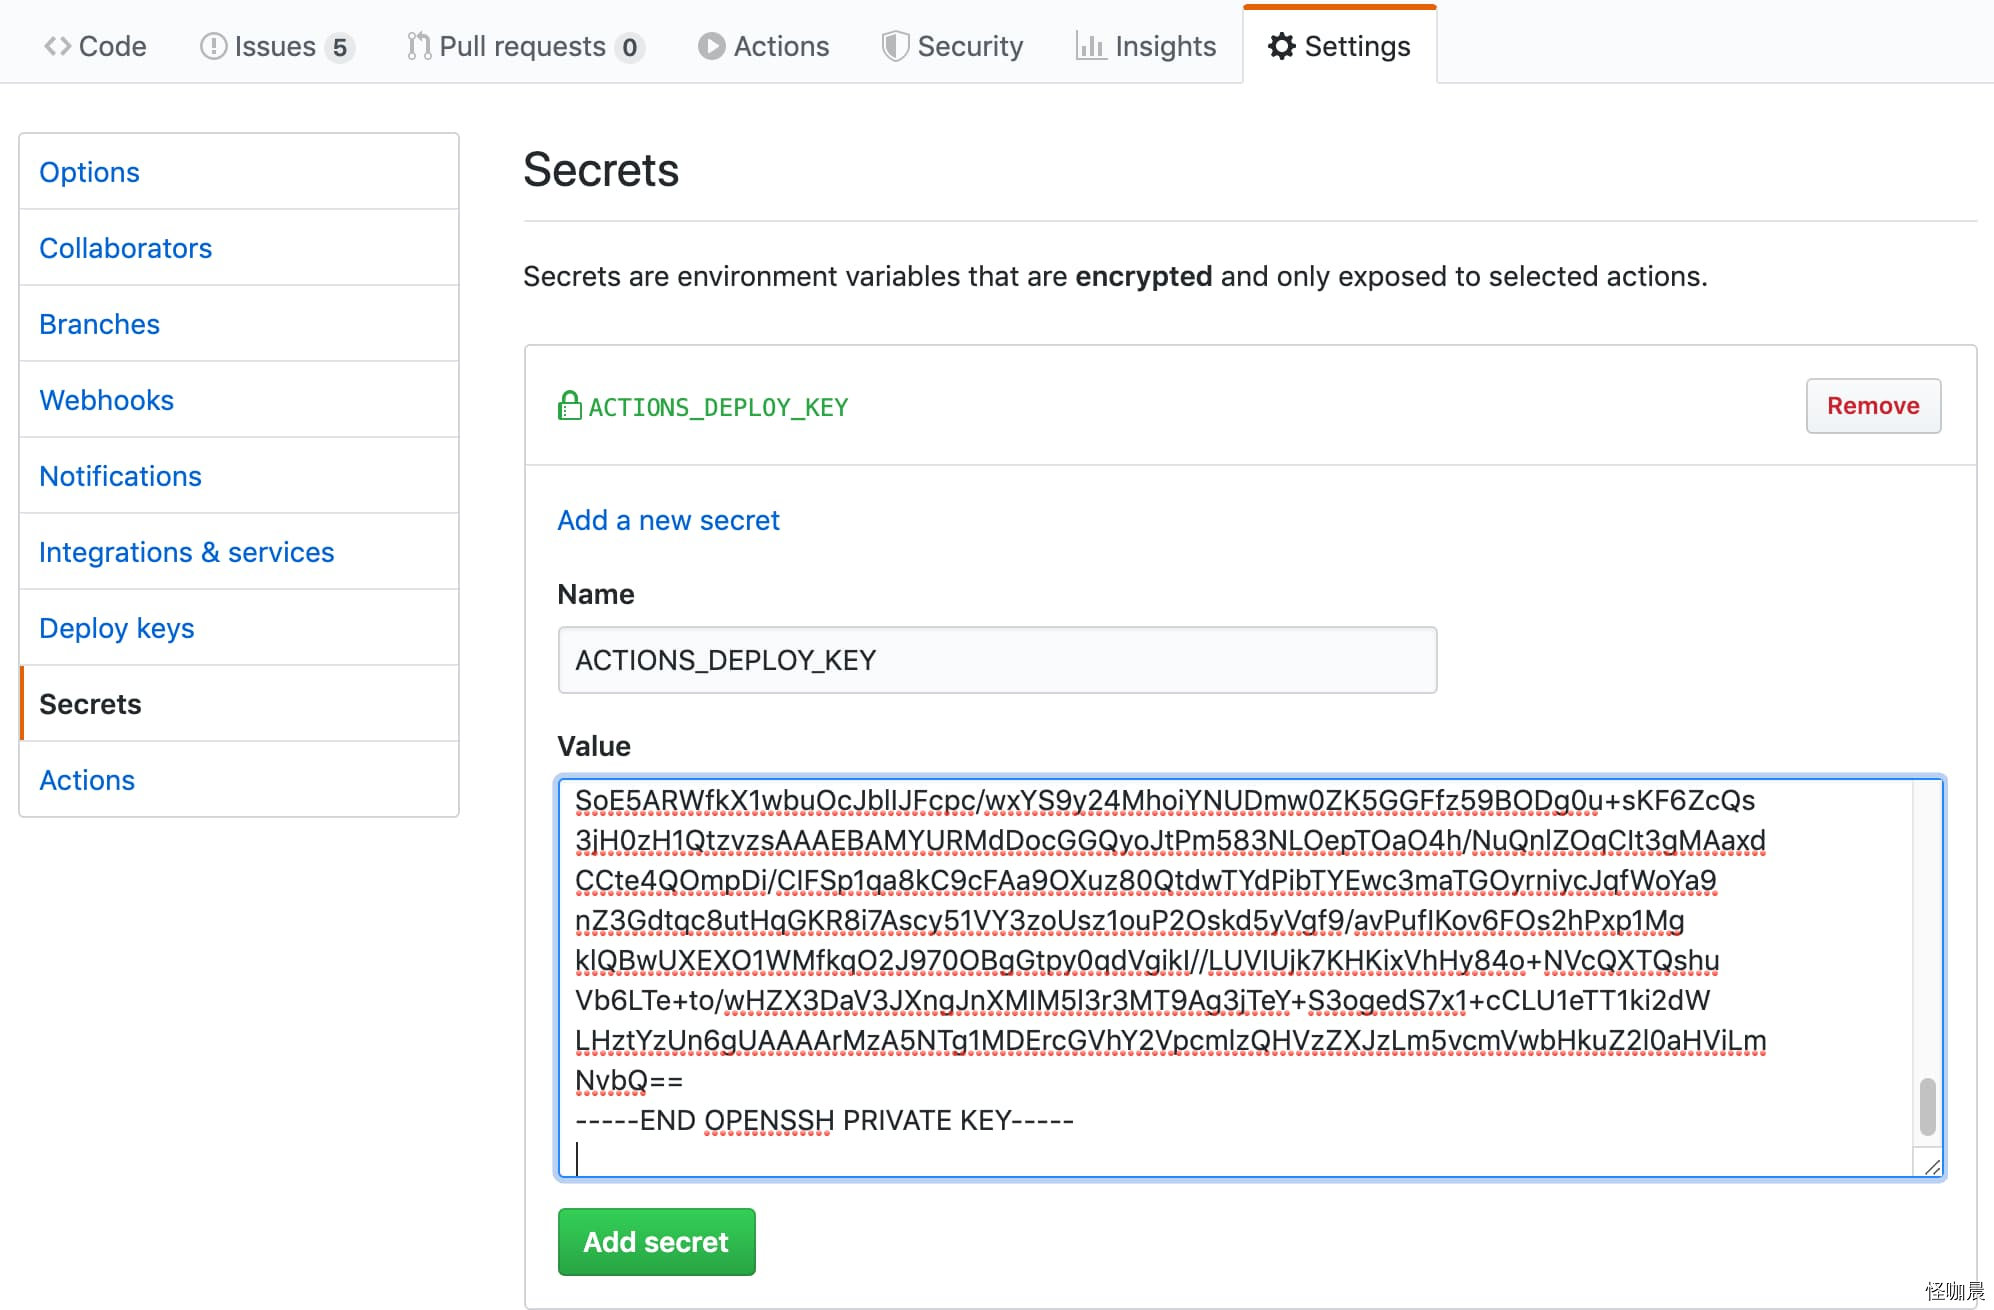 |  |
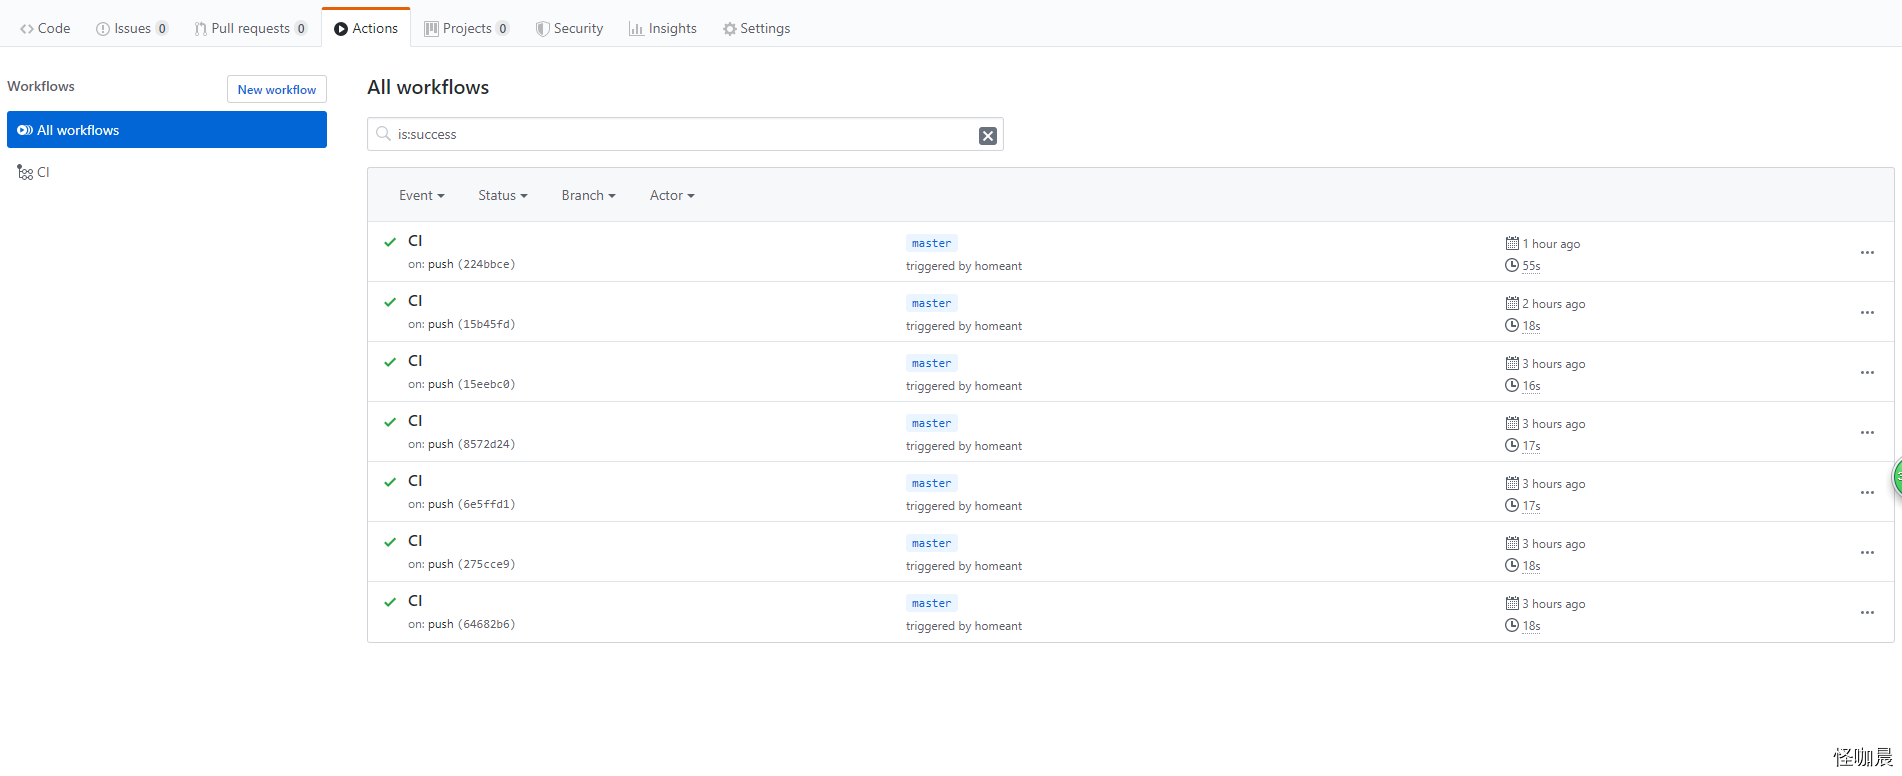
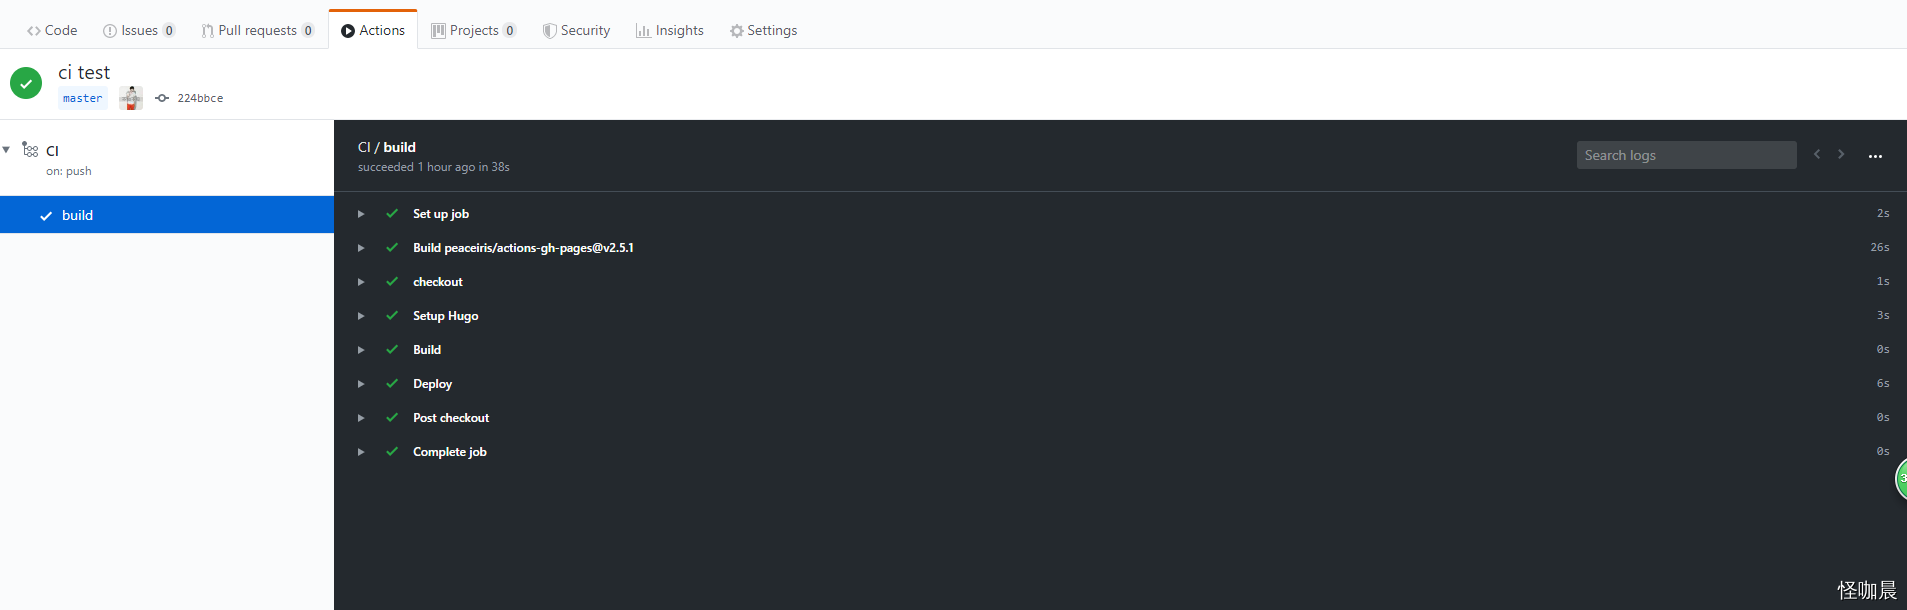
然后,你就可以提交代码了,push成功后,打开仓库actions,至此部署成功,大功告成!
相关文章:
- 通过GitHub actions发布hugo到私有云服务器